Jax, Me, and the Surf

Jax, Me, and the Surf

Friday, August 19, 2011

Follow Up Sump Work

I took the opportunity today to give the sump and DT a quick vacuum.  While I was at it, I drained the sump completely (as much as I could) in order to put the baffles back in place and silicon them in.

They are still drying, and I only had enough silicon to do the first two baffles.  The third should be OK, but we'll see.

I'll fill it back up tomorrow and see how it does.  Hopefully they don't collapse, otherwise I'm going to need more silicon ;)

Here are some shots from today:


Monday, August 15, 2011

Daylight Update

Still in the photo taking mood.  Here's some shots w/ the daylights on.  Nothing else, just pics.


Sunday, August 14, 2011

August Update

It's been a few weeks since my last update.  That's about the time the "sump build" started.

Utilizing days off, plus other random moments here and there, I've finally completed the sump... mostly.

Still on the to-do list is to get the baffles worked out.  I went with the "weather stripping" method and got less than stellar results.  Once the baffle situation is worked out, I am going to (once again) attempt to move my HOB skimmer to the sump.  After the skimmer is gone (if possible), I'll then move my heater to the sump.

Other than that, it's up and running.

A couple days ago I ended up (finally) removing the Chaeto from my display tank.  I trashed all of it (about two grapefruit sized balls) except for about a golf ball sized piece.  I threw that down in the sump so as not to have to look at it anymore.  I'm hoping with the new changes, it doesn't last long ;)

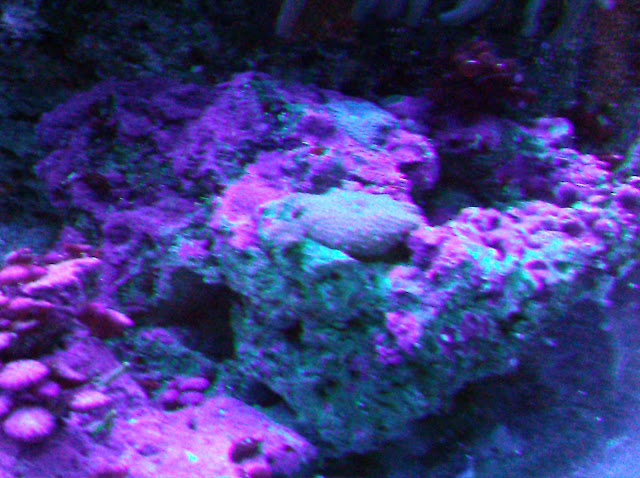
Took a few shots tonight.  Didn't get any of the sump (here is my sump gallery), but I did get a few close-ups after lights-out with just the actinics.


Everything is still going well.  I'm not sure if it's the new RO/DI system installed or the sump (perhaps a combination of both), but I've been feeling good thoughts from the tank.

Just before installing the sump and water system, I completed removal of a vast majority of the substrate. Last week's water change consisted of 10 gallons and about 30 minutes.  Such a nice change of pace for cleaning the tank.

Today's water change also included the sump since it'd been working for about a week now.  I utilized the power head I purchased for my salt storage container.  I used it to suck up the detritus on the bottom of the sump and had it pump it through my gravel vacuum tube into a bucket.  The sump took about 5 gallons, and the tank another 10 gallons.  ASW was already made (had been for about 4 days), so I headed down to the basement with three buckets, filled them up, and brought them back up to the tank.

I utilized the same power head to pull water from the buckets into the sump.  The whole process took about 30 minutes again.  Now with all the things I have in place, I KNOW I'm removing much more of the detritus than I was 30 days ago, and I KNOW that I'm not adding anything with my water.

Removing crap and not replacing it while filling with water is a really nice feeling, I must say.  Probably why I was in the snapshot mood tonight.  I have a restored feeling of pride in the tank.

Monday, July 25, 2011

Just about there

So today a spent a lot of time on the tank...  and as life would have it, it doesn't look like it.

Once again I siphoned more sand out.  I probably got another 3 gallons out.  Almost everything except for the sand underneath the anemone bowl.  I ended up changing about 25 gallons of water today (33%) and it looks like crap.

I also took this opportunity to see what siphoning a bare bottom would be like.  It was actually pretty easy.  Water changes are going to be a lot quicker and will use less water in the future.  I bet I can cut the water changes from 20 gallons (27% change) to 10 or 15 gallons (13-20%), depending on how many hermit crabs are in the way.

Had a good day at the LFS today as well.  Had a nice chat with the owner about what I was wanting to do.  Ended up purchasing a RO/DI unit (about damned time), an HOB overflow, three more powerheads (2 x 425 gph and 750 gph), and a return pump rated at 750 gph.  That takes my display flow to 3625 gph (tank turnover of 48 times per hour).  This amount of flow should keep detritus suspended nicely until it is drawn into the sump.  The flow rate for the sump is much lower to allow that detritus to settle there.

Later I stopped by Home Depot with my return pump and overflow to figure out the plumbing.  All my pipes are purchased as well.

So I have everything I need except for the sump container itself.  I'm still undecided between a glass tank, a DIY acrylic box, or a rubbermaid tote.  If I could plumb two totes together, that would be even better.  I have about 36" of width that I'd like to fill, which would give me 12" of storage in the cabinet still.

More later as the build progresses.

Thursday, July 21, 2011

Jax's Reef - The Way it Should Have Been

So I've been trying to decide these last couple of months whether or not to breed clowns.  If I decide not to, there are still some upgrades I'd like to do to the display tank...

Perhaps it's that I'm inexperienced in a majority of aquarium equipment.  And then again perhaps I know precisely what I'm looking at when shopping for equipment and stuff is just really that expensive.

So if I decide to breed the clowns, I'm looking at an initial investment of about $1,000.  Granted, about half of that is equipment I would want regardless of breeding or not - like a RO/DI unit ($300), refractometer ($60), return pump ($100) for a sump installation (either breeding or on the current display tank).  So these are the common items.

If I decide to breed, I'll also require a couple of HOB overflow boxes ($120); microalgae, brine shrimp and rotifer cultures from Florida Aqua Farms ($175), larvae catcher ($100), breeding jugs for the food, air pump ($75), misc plumbing, lights, timers, etc.

If I decide to install a sump, I'll still need one HOB overflow box ($60), misc plumbing parts, light, timer, etc.

Breeding will require an unknown amount of daily time, probably at least a half hour or so.  I really don't think I want to spend money and time on something additional.  Perhaps when/if I retire and need a hobby.  But I currently have plenty to keep my hands full.

I've been back and forth for the last couple weeks.  But today is the day I put my foot down and decide.

I think I've decided NOT to breed, but to make the display tank as it should have been initially - with a sump for convenient nutrient export, housing equipment, and water polishing.

Installing a sump will be no simple or quick task, and while I'm "in there" there are a couple other things I'd like to get done:

  • Remove the display tank so that the sump can be dropped into the cabinet from the top.  This will make installing the sump tank easier than going in from the back and removing the rear vertical support.
  • Level the stand.
  • Removing the remainder of the substrate from the display tank
More plans and thoughts on the matter will follow.

Saturday, July 16, 2011

More Siphoned Sand

Today I did a water change.  I didn't test before changing so I don't have any pre-change data.  I had an opportunity to remove more substrate so I took it.

I ended up removing the rocks in the right third of the tank in order to remove the substrate from that area.  Those rocks are now sitting on bare glass.  When I put them back I wasn't too concerned about how it looked, so it doesn't look all that hot.  After all, those rocks will need to be removed again to make room for the anemone bowl so that I can remove the substrate from underneath it.

About 3 gallons of substrate was removed today along with 25 gallons of water.  I can't believe how much crap there was in the substrate at the edge of the rocks...  Brown powdery crap that would have sat there for a millennia.

Like I said, I'm not happy with the rocks, but I'm happy with the journey.  Once I get the substrate from under the anemone bowl I can concentrate on visual appeal of the placement of rock.  Or, who knows... I may have a sump by then with the currently-unsightly rocks in the sump.  Doubt it though ;)  I need something for the coral to grow on.

That's it for now.  Any pictures posted prior to the end of this journey will definitely be work-in-progress pictures.

Sunday, July 10, 2011

A Slight Juggling Act

So I have a couple things going on salt-water-wise:

Due to the availability of nutrients in the tank for algae (nitrates and phosphates) I've begun removing substrate from the tank.  During my last water change of about 25 gallons, about 4 gallons of substrate was removed.

I decided to remove the substrate for a couple of reasons.  Substrate is (at least partially) the cause for my phosphate levels (feeding is another).  I do not wish to change my feeding habits, so in order to make the single most possible impact with just a single action, substrate removal is my plan.  It's the biggest bang for my buck toward getting nutrients under better control.

Removing substrate will also help with nitrates in an indirect way.  There will be little if any hidden detritus to decay (contributing to both nitrates and phosphates).  This will assist with husbandry, and subsequently will assist in keeping those nutrients in better check.

It's also almost time to begin acquiring breeding equipment.  That will probably take at least a couple of weeks to acquire.  Maybe my goal of grabbing a July clutch is slightly unrealistic...  but definitely an August clutch is possible.

Thursday, July 7, 2011

June Update Part 2

Alright, got the pics taken.  Forgive the slight cloud in the water.  I just siphoned.

Full Tank Shot.  Not quite what i'd call colorful ;)
Anthelia
Now (remember, just siphoned so water is cloudy...)

And then.  It's really thickened up since this picture was taken.
Mushrooms
Now (the rock can't even really be seen)

And then.
Full shot of most of the mushroom spread.

Look close enough (center) and you can see a mushroom growing at the base of the anemone bowl.

Here's a mushroom that hasn't attached to anything yet (except substrate).

This rock (toward the front right of the tank) is a popular spot for mushrooms.  The large one attached here, the small one bottom right of the large mushroom is a new seed.  Then the bottom left appears to be a loose one from the original colony.
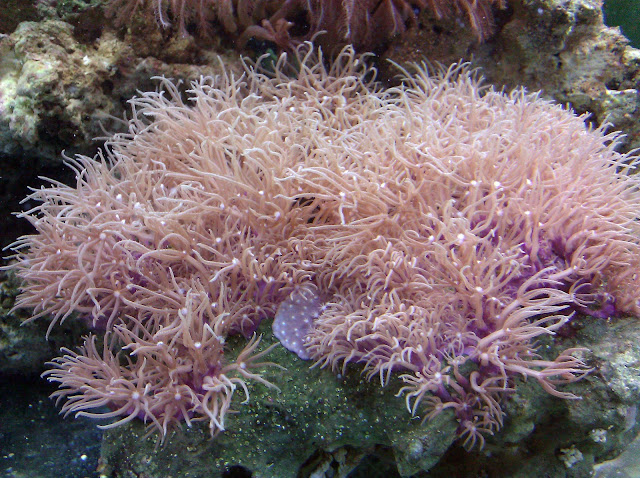
Green Star Polyps
Now.

And then.  The GSP has done well in the tank.  The bottom center bare spot isn't as bare now as it used to be.
Here is just one area of new growth.

June Update

Nothing much going on in June except planning and shopping for breeding supplies.

Water changes have still continued (roughly) once a week.

Cyano is still a problem, but not until about day 7 after the last water change.

It's been a while since posting any pics.  I'll get some up today or tomorrow.

About five mushrooms have removed themselves from the main colony in total.

Green Star Polyps have started to spread.  I'll get some close-ups of this.

Anthelia is also spreading.  Photo evidence also on the way.

I'm also planning on getting at least one benthic sump running - I think mostly for the breeding setup.  I hesitate to get one put on my display tank simply because "things happen".  Who knows how long (or prolific) the breeding will be.  I may already be a day late and a dollar short when it comes to selling the fish to local stores.  But that's not my primary focus, so I've yet to inquire.  If nothing else, there's always Ebay and Craigs list.  That puts me in competition with the LFS's, and I'd rather be a partner.

But anyway, if I get a sump for the breeding tanks and things fall through, plumbing the sump to the display tank is "plan b".

Also, I'm toying with the idea of removing the substrate from the tank.  Not all at once, but over the course of months as I do water changes.  I doubt I'll like the look, but it takes 15 gallons for me to properly siphon.  If I don't like the look, I can always paint the outside bottom white.  My only concern is shifting the anemone bowl and causing damage to the anemone's foot.  I may do the perimeter of the bowl in baby-steps so the anemone has time to adjust itself.

That's it for now.

Tuesday, June 7, 2011

Breeding Preparation - Clownfish Larvae

The following post is simply a place for me to get thoughts into the physical world and to compile information found from multiple places into one.  This post is a work in progress.

Items Needed:
  • Larval Snagger
  • Brine Shrimp (starting day 5)
  • Rotifers (starting day 1)
  • Phytoplankton feeding the rotifers & brine until they are eaten by larvae
  • Ammonia Alert Badge
  • iodine
Equipment needed:
  • 5 Gallon Tank
  • Rigid airline tubing to act as siphon to clean
  • Heater w/ bubbles for circulation
  • Air Pump
  • Light
  • Timer
Environmental requirements:
  • Salinity - 1.020
  • Water temperature - 80-84*F
  • Lighting - same as parents
  • Water Change - 1-2 times per day to keep ammonia < 3ppm
  • Siphon - daily
  • Dosing - iodine (1 drop per gallon per day after metamorphosis)

Monday, June 6, 2011

Breeding Preparation - Brine Shrimp

The following post is simply a place for me to get thoughts into the physical world and to compile information found from multiple places into one.  This post is a work in progress.

Items Needed:

Equipment needed:
  • 5 gal bucket or water jug
  • Air Pump
  • 1/4" tubing for air with valve
  • 1/4" tubing for drain with valve
  • 1/2" or 3/4" tubing for feeding with valve
  • 1/2" or 3/4" tubing for dispensing brine with valve
  • heater
  • thermometer
Environmental requirements:
  • Salinity - 1.020
  • Water temperature - 80*F
  • Lighting - ambient (direct light attracts them making them less likely to breed)
  • Water Changes - weekly 25%
Thoughts:
The jug will be of similar design as the phytoplankton.  Tubing will vary depending on the behavior of the contents.  Hatched eggs float.  Unhatched eggs sink to bottom.  Brine tend to congregate at surface, too.

Breeding Preparation - Rotifers

The following post is simply a place for me to get thoughts into the physical world and to compile information found from multiple places into one.  This post is a work in progress.

Items Needed:
  • 53 micron screen
Equipment needed:
  • 5 gal bucket or water jug
  • Air Pump
  • Air Stone
  • 1/4" tubing for air with valve
  • 1/4" tubing for drain with valve
  • 1/2" or 3/4" tubing for feeding with valve
  • 1/2" or 3/4" tubing for dispensing rotifers with valve
Environmental requirements:
  • Salinity - 1.020
  • Water temperature -
  • Lighting - 12 hours, preferable ambient
  • Water Changes - once a week, 50%
Thoughts:
The jug will be of similar design as the phytoplankton:  
  • An airline tube inserted into the bottom
  • A "cleaining" tube also inserted into the bottom for draining any gunk that collects on the bottom
  • A dispensing tube inserted about a fourth of the way up the jug.  For dispensing rotifers.
  • A feeding tube inserted toward the top of the jug.  For adding ASW or phytoplankton.  Will also serve as a vent.
Since rotifers live in the water column they can be pulled from the jug with a tube located below water level.

By having valves on each of the tubes, rotifers can be dispensed to containers at equal or greater height than the jug.  By closing all valves except air and dispensing valves, air pressure could be used to transport rotifer water where ever it needs to go.

Breeding Preparation - Clownfish (post-metamorphosis)

The following post is simply a place for me to get thoughts into the physical world and to compile information found from multiple places into one.  This post is a work in progress.

Items Needed:
  • Toys (PVC joints, anemone look-alikes)
Equipment needed:
  • 10 Gallon Tank
  • Rigid airline tubing to act as siphon to clean
  • Heater
  • Light
  • Timer
  • Powerfilter?
Environmental requirements:
  • Salinity - 1.020
  • Water temperature - 80*F
  • Lighting - same as parents
Thoughts:

Would it be easier on the this and subsequent batches if this tank also became their grow-out tank?  Instead of moving fish based upon size into subsequently larger tanks, perhaps have post-metamorphosis tanks large enough to be their final tank.  So instead of using a 10 gallon tank, perhaps bump it up to 20 or 30 gallons...

Breeding Preparation - Phytoplankton (Nannochloropsis)

The following post is simply a place for me to get thoughts into the physical world and to compile information found from multiple places into one.  This post is a work in progress.

Items Needed:
  • Miracle Grow Liquid Plant Food
  • Phytoplankton starter culter
Equipment needed:
  • 5 Gallon water jug w/ tight fitting cap
  • Air Pump
  • Tubing - 1/4" for air
  • Tubing - 1/2" or 3/4" for dispensing and filling
  • Valve for dispensing tube.
  • Valve for filling tube (if not open-top)
  • A stand to hold the 5 gallon jug inverted
  • Heater
  • Light
  • Timer
Environmental requirements:
  • Salinity - 1.019
  • Water temperature - temperature tolerant, but will keep at or above 70*F
  • Lighting - 16 hours on, 8 hours off
Thought Processes:

Phytoplankton will play a large role in breeding clownfish.  Phyto is the food for the food the larvae will consume.  It can be used to feed both rotifers and brine shrimp.

I don't want to mess with 2 liter bottles.  Instead I would prefer utilizing a 5 gallon water jug - whether or not the jug contains 5 gallons is another issue.  The jug will be inverted to utilize the shape of the container to allow for a minimization of dead spots.  Dead spots don't seem to be an issue with phytoplankton, but they are with rotifers and brine shrimp, and I plan on using similar designs across the board for all three.

I haven't yet decided if it's necessary to remove the bottom of the jug.  Vent holes will be necessary, as well as drain holes for tubing.  Water could be added via a tube located toward the top of the jug.  This same tube could server as a vent as well - at least when water is not being added.

The air tube would be inserted perhaps 1/4" into the lid and sealed with silicone adhesive.  This tube would be run up to the air pump located physically above the jug.  A valve would need to be installed on this line to control the amount of aeration the phytoplankton receives.

If possible, a drain tube (1/2" or 3/4") would also be inserted similarly into the lid to allow for distribution of the phytoplankton to other containers - rotifer breeder, brine breeder, storage jugs, etc.  This tube could also be used to drain the jug completely if necessary.  It, too, would need a valve and installed as close to the lid as possible.

The third tube, a filling tube, would be installed at the top 1/3rd of the jug.  It would be used to replenish ASW as needed and would also require a valve, however this valve would almost always be open.  However, with an open top, this tube would be unnecessary and would also allow for cleaning of the jug.  A design decision still needs to be made here.  If the jug was completely sealed, air pressure alone should be enough to be able to dispense phytoplankton to the rotifers and brine shrimp that will be located at the same level as the phytoplankton jug.  Those jugs will also have "feeding tubes" which would allow for ASW or phytoplankton to be dispensed into them.

Sunday, May 29, 2011

The Clownfish Clutch Blooms

I did, indeed, check in with the Clowns tonight, about an hour and a half after "lights out".  I could tell just by their behavior it was not a typical night.

A typical night in the life of a Clownfish (at least in Jax's Reef) mostly entails sleeping within the anemone's tentacles.

Tonight, the Clowns were busy tending to their eggs.

I grabbed a video.  Very cool.  As the Clowns tend to their clutch (left), larvae can be seen swimming in the foreground (right).


I can't wait to get set up for the rearing of Clownfish larvae so that these precious lives do not go to waste.  Already, due to the running filtration and power heads, some dead larvae were witnessed even this early.

I'll see if I can get any videos in the morning.  The larvae are supposed to have a yolk sac that contains about 12 hours of energy reserves.  As long as some can avoid the filtration and power heads, I may be able to get some daylight shots before they become food.

Further Thoughts on Breeding

I was doing a little reading tonight on Clownfish - more specifically the various stages of their egg patch, or clutch.

Prior to tonight, I thought that when the clutch turned black that the clutch was no longer viable.  Generally in life, even in saltwater life, black is bad.  However with clutches that is not the case.

I noticed today that the clutch had started to gain a silvery appearance.  That, too, is a good sign.  It's also a sign that hatching is near.  Here's a snapshot I took tonight of the clutch:


It got me thinking again about breeding - nothing as grandiose as my prior plans have been.  Just a tank or two, some simple flow and/or filtration.

Off to do more research.  I think the bulk of my learning will be on what is required (monetarily and physically) to raise the food required to fuel the raising of the fish.

The eggs are supposed to hatch within a few hours of "lights out", which was about an hour ago.  I didn't bother turning off filtration or power heads since I'm in no way prepared to take care of the larvae.  But I think I'll go check on them periodically tonight to see if any larvae will greet my flashlight.

Saturday, May 28, 2011

Picture Update

It's been two or three weeks since the last pictures.  Here's how things are going...


Mushroom Update
Mushrooms Before
Mushrooms Current
Here is a comparison of the mushrooms.  If you look closely, you can see how they've increased in density.  Within the past few weeks, heads have begun to "pop off" or remove themselves from the colony.  About four so far have done this.  I've assisted each of the four heads in relocating in the hopes they will re-attach.

This is the rock immediately below the mushrooms.  The first two head that removed themselves were put here, but they ended up falling inside a hole in the rock when they closed up.  I'm not sure if they are both OK, but one pops out mid morning through this hole.

This is the fourth head that removed itself from the colony.  There was a little too much flow around the third head for it to attach in the same place, so I moved it up and to the right of the current colony.

This was the third head to remove itself.  This had no hands-on intervention by me.  It found a slow-flow area and was able to attach itself.  This rock is below the current colony and up in front on the tank.

Anthelia Update

Anthelia BeforeAnthelia Current
Not much to say about the Anthelia except it, too, has gotten more dense. I suppose it's only a matter of time before they start removing themselves from the colony and setting up shop elsewhere in the tank.

Star Polyp Update
Star Polyp BeforeStar Polyp Current
This may not be a fair comparison - the image on the left is effected my a majano anemone (just right of center) and a few aiptasia (left edge).  There are still a few aiptasia on the current photo but their placement does not effect the polyps as much as before.  I don't know if I necessary noticed this coral spreading, but in the places it is, it certainly looks better.  Also picture at the bottom left of the rock, a calciferous worm has taken up residence.  That is the horizontally running "white tube" just to the left of the bottom-most cluster.

Neomeris annulata update


N. annulataN. annulata Current
The single "seedling" bleached out after the first picture was taken.  It happened during a time when the power filter was put back into use.  This tells me that nitrates need to be at or below 20 to have this algae.  The current picture isn't the best, but it's amount of spread can be distinguished by color alone.  Nitrates run no higher than 20 in the current setup.


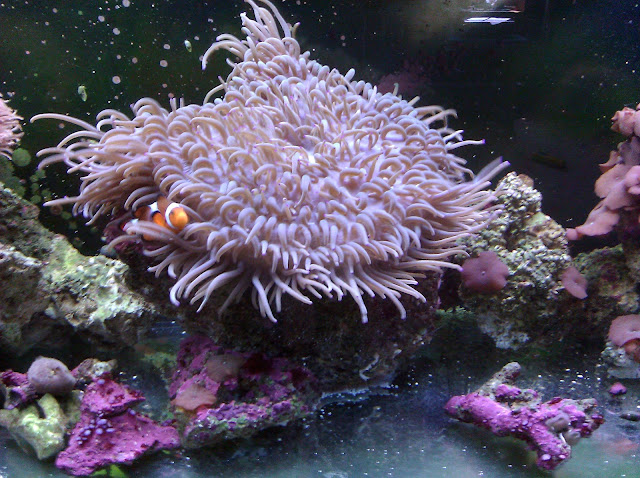
Here's how the anemone is doing.  The male clown can be seen underneath and to the left tending to the eggs they've recently laid.

This particular rock has a sponge that is getting bigger.  It's also accumulating a lot of pineapple sponges.

Thursday, May 26, 2011

Stress Graph Adjustment

Just made an adjustment to the Water Change Stress Graph (or whatever I call it).

Instead of nitrates at 40 being 100%, I've adjusted it to max out at a nitrate level of 20.  That change will help going forward, but makes my historical graphs look horrible with those "200%" spikes.

I did a quick search to see the what levels of nitrates stress coral and anemones.  The answer was 20.  That's why the lowered maximum.

BTW, noticed another dead hermit a couple days ago.  Another one bites the dust.

Friday, May 20, 2011

Build it and They Will Come

Been a while since my last post.  I've mostly been hanging out at the Reef Tank forums... learning.  So I suppose a few updates are in order:

My single Stomatella now has company.  I've noticed at least three others.

Since turning my power filter into a chaeto house, water quality seems more stable.  Sure, there are nitrates, but they aren't increasing on a daily basis.  And it's been just over a week since the last water change.  I'm not stretching it to see how far I can go, but I'd also like to not have to blow through 50 pounds of salt in 6 weeks, either.

The last time I removed the power filter I noticed a single Neomeris annulata.  Then when incorporating the power filter once again, the annulata seemed to bleach and nearly go away.  This time I have a small mat of them.  I'll get pictures up sometime soon.

Within the past couple of days I've had another algae bloom.  Mostly cyanobacteria.  So any pictures before the next water change will reflect such.

I'm down to feeding the anemone once a week.  I generally give it three or four freeze-dried krill.  I'm basing this on the amount of krill I found during it's last waste expulsion.  It could probably eat every 5 days, but that's not the easiest thing to keep track of, so once a week it is.

I'm also noticing the beginning of purple and green coraline algae spots on the back glass.  I tend to neglect the back glass hoping that a coral will attach and use it as a growing surface.  Some corals seem like they only grow on the purple coraline, and others... well, I can't really see their perch like I can with star polyps so I can't really tell.

Lost another Dwarf Hermit Crab three days ago.  Not sure why.  Perhaps a lack of food?  I doubt it, but I don't know for sure.  The others (down to 6 from 10) seem to all be doing fine.  I don't know if I blogged about it, but a couple weeks ago I went and got 6 new larger shells for them.  At least three have changed shells.  I know for sure two of the larger ones have the new shells, and the smallest has move into one of the discarded shells.

I'm still working on charting water quality time frames comparing a power filter tank with a non-power filter tank.  It's a work in progress and will be published when results have sufficient data.

Running without the power filter (and a sump) definitely has it's drawbacks, but I'm learning to live with some particulates in the water.  They do eventually settle (over a few days vs a few hours), but are still in the tank waiting to be stirred up again.  I think that's why I'm letting the cyano and other algaes get more of a foothold than normal.  I'm hoping the algae, when removed, will take some of the settled particulates with them.

Other than the process of planning a benthic sump (which will obviously be documented), nothing much else going on except tank watching and forum reading.  I'll see what I can do to get pictures up soon.

Tuesday, May 10, 2011

Saltwater Aquarium Advice

I was going through some older posts of mine on TheReefTank.com forums and thought I'd share some advice I was giving another person who is just a couple of months behind me:

Originally Posted by 46bowreef
I'm just so worried about getting things and they die I have some mollies in there now to serve the purpose of the damsels so i'm looking to add something nice in the near future.
I think there are two or three big things to consider:
  • Take everything nice and slow. Equilibrium can be a bitch.
  • Be prepared to answer the question "If you could have only 1 inhabitant, what would it be?" and emulate that environment (whether it's nutrient-poor or nutrient-rich conditions). Also be responsible enough to pass on your #2 choice if it cannot live in the same environment as your #1 choice.
  • Listen to the water. It will tell you when it needs changed.
It's OK to worry about losing something, but don't beat yourself up over it, and don't let that stop you from taking on that responsibility if it's something you can realistically handle. It's going to happen. Learn from your mistakes, understand cause and effect, and get to know history (learn from others before their mistakes become your own).

Without getting into specifics, this is the best general advice I can give you. I'm only ahead of you by a couple months. I know what it's like to worry, but there needs to be something somewhere to keep you just outside of your comfort zone. How else will you know the extent of your abilities?

I admittedly have no business with an anemone in a not-even 4 month old tank. I never would have come home from the LFS with one, even if the owner would have allowed the sale. But I figured at the time that survivability in a 10 week tank was better than that of a leaking tank which would be empty in a matter of hours.

The nobility of the anemone keeps me measuring the amount of skim I collect daily, testing every 2 or three days, changing water when conditions require it (even if I just changed water yesterday), and recording what I feed.

In my opinion, it's the statistical unlikeliness of the anemones survivability in an immature tank that makes me a better reefer.

Thursday, May 5, 2011

And the Seedling Is...

Neomeris annulata

Also known as Spindleweed Algae, Sea Sausage, Caterpillar Weed, Fuzzy Tip Algae.


From www.midwestmarineguy.com
Requires high lighting like that needed by clams and SPS corals. Neomeris Annulata also requires a lot of calcium to keep growth steady. Pristine water conditions are also necessary, only trace amounts of nitrates to keep the Neomeris Annulata fueled, should be in the water.
Treat the Neomeris Annulata as if it were a coral it should grow like wild for you. This is a very tricky macro algae to keep around(for many who want to keep it) for long periods of time.
Neomeris annulata produces chemicals which deter fish from eating it. Parrot fish , urchins, nudibranchs, and Rabbitfish don’t seem to eat them. Sea Hares will eat the Neomeris Annulata, but it is inconsistent between Sea Hares and the Sea Hare will not rid the tank of the Neomeris Annulata. The Neomeris annulata algae is on the obnoxious algae list.
So it -can- be a nuisance algae, but it is a very, in my opinion, attractive algae that behaves as if coral.  On the "difficulty to maintain" it ranks a 4 out of 5 (5 being the hardest).

We'll see what happens.

Wednesday, May 4, 2011

Noticings of Early May

I've been eying a few new discoveries in the tank.  Some have been for weeks, others only a couple of days.

Not sure what this is, but to the eye it looks like a seedling.  Here with magnification, I'm back to being stumped.
Not sure what these two things are, either.  A good picture of the "Feather-Mounds" is in the first image of the "seedling" directly to the left.

Tuesday, May 3, 2011

The Silly Things Bristle Stars Do

For a while now I've seen where folks will exclaim that, during feeding, their stars will "reach out and catch" things as they drift by.  I always thought that was a little over-stated.

Two things have happened to start to sway my opinion:

I did a little "light" reading on Brittle Stars (how they aren't really starfish, their digestive system, nervous system, skeletal system, etc).  I learned the nerves in their legs are sensitive enough to detect light (which is how they know when it's dark even though they have no eyes), and that those nerves are also sensitive enough to be able to detect smell.

Over the past week or so, I've noticed that during feeding time (at least with mysis cubes) the Brittle Star, which generally has a few ends of his legs out on the substrate, will begin to sweep the substrate looking for food.  Today there was nothing of the Brittle Star exposed... until the cube hit the water.  Two or three legs came out from his hole almost immediately.  They were dancing around like a couple of Keystone Cops trying to get out of each others way.

Those legs didn't have too much luck with catching mysis... I noticed one, maybe two shrimp that the Brittle had caught.  It wasn't until I noticed the mysis starting to settle upon a rock positioned above his hole that I became a believer.  A leg pops out of a nearby hole, grabs the mysis directly, and disappeared back from where it came from.

I'm thinking that specific leg detected the odor of the mysis and went straight for it.  It's not quite like plucking food out of the water column that is drifting by, but almost.

So I think I'm more open toward comments as such.

It's also been a while since I've posted some pics.  Here's how things are going now:

Notice the tank has a mostly-green color.  That's the prevalent color of the species of coraline algae that is proliferating.

Looking closer at the coraline, it's still mostly green with some hints of purple at the top right and bottom left.  The bottom right rock seems to be encrusting with a grey coraline.  Hair algae can also be seen bottom left, as well as the last remnants of cyanobacteria.  The center rock, at it's bottom, shows the white color those rocks used to be.  And the mushrooms seems to be very happy.  The specs on the back of the glass are "chaeto critters", some sort of "pods".  They are everywhere.

Here you can see more purple and green coraline algae.  The anemone bowl is also starting to take some coraline.  The longer white specs on the bowl are some sort of tube worm.  The smaller specs are just substrate.  To the left, the chaeto can be seen.  It's about twice to three times as big as when I got it.  Not a good sign for my water, but at least I'm combating the nitrates and phosphates in some fashion.  Hopefully a RO/DI system is in my future.

I have a sponge and some sort of white feathery things on the vertical rock bottom right.  The Star Polyps (center) are still doing great, as is the Anthelia (top left).  The rocks to the left are still brown.  The purple coraline seem to prefer these rocks more than the green.